
Install instructions for colorWorkbench 18.2 or newer
System requirements
Minimum system
• Minimum Dual-Core, Intel i5 with 2GHz or better
• Minimum 4GB Ram
• OS supported: Windows 7 SP1, Windows 8.1, Windows 10
Do NOT install in a virtual machine or on a Windows Terminal Server! These scenarios are not tested and not supported!
Recommended system
• Quad-core with 2.5GHz
• 8GB Ram
• Windows 10 x64
colorWorkbench installation
Start the installation
by double clicking on the installer icon. You will need admin privileges
to install the software, but not for running it later.
If there are some components missing, the prerequisites are installed first. This can include the .NET Framework 4.7 which is needed in any installation scenario. The SQL Server 2014 is optional.
You can either install it by
hand before the colorWorkbench installation (then it will not be
selected as prerequisite here) or you can use a SQL Server on another
computer. This depends on your installation scenario.
For more information about database scenarios and SQL server installation, please read here.
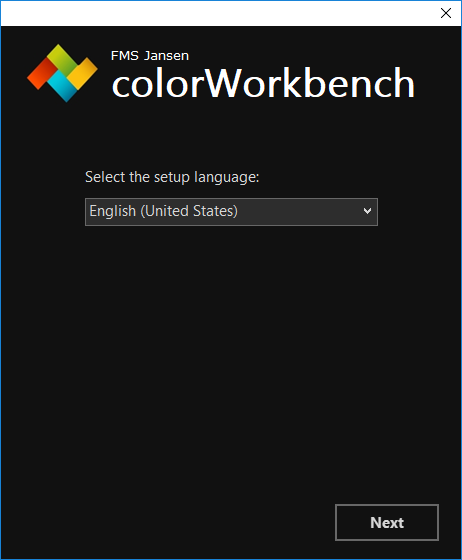
Select a language
first, then click Next:
If some prerequisites are missing, those are installed first. Click Next:

If the .NET Framework has to be installed, this option will also be presented here, but you cannot unselect it since it’s a necessary component to run colorWorkbench.
If you have any problems during the installation of the .NET Framework (especially under Windows 7) then run Windows update to update your computer and try again. Click Next:

Then the colorWorkbench installation will start. Click Next:

Check the License agreement box. Then click Install:

After a short while, the program is installed. Start it by double-clicking the colorWorkbench icon on the desktop.
colorWorkbench basic configuration
When the software is started for the first time, some basic settings have to be done. Enter a name for the system. This should be a unique name for the line like “Production line 1”. The name is important, if you have more than one line. Select the language and check the checkbox for touchscreen support, if needed:
Then configure the measurements database connection. Click on Connection Measurements.
Measurements database settings
If it’s the first installation, the system will have default values that should work when you have installed the SQL server with the colorWorkbench setup. If you have manually installed it or if you are using another database server, you have to alter the settings. If the settings are ok, click on OK:
If the database does not exist, but the server settings are okay, you will be asked, if you want to create the database now. Click Yes to create the database or No to change your settings:

If you choose to create the database, you will be asked, if you are using metric or imperial units. Choose a value that fits your needs. This setting is important for the SpectraTrend’s distance sensor setting and for the settings in the auto-created standard in the database:

After creating the measurements database, you are back in the main window and the SQL server and database fields for the measurements database will show the settings you have made:

Then click on Connection shared to set up this connection.
Shared database settings
The connection settings will be pre-set to the values of the measurements database. If you are using only one system, this is okay, if you are using more than one system in combination with multiVIEW, choose a different database here! In this case enter CWShared for example in the database field and click New database to create it. After that, click OK:
Database setup example
You have three systems on three computers. Each system should be reachable through colorObserver. There is no external SQL server.| Measurements database | Shared database | |
| Computer 1 | Computer1\SQLEXPRESS Database name: CWData | Computer1\SQLEXPRESS Database name: CWShared |
| Computer 2 | Computer2\SQLEXPRESS Database name: CWData | Computer1\SQLEXPRESS Database name: CWShared |
| Computer 3 | Computer3\SQLEXPRESS Database name: CWData | Computer1\SQLEXPRESS Database name: CWShared |
In this case, as the shared database is on Computer 1, it needs to be run even if no measurements are taken on this line. colorWorkbench does not need to run, but the PC must be switched on.
Now both database connections are set and an instrument needs to be configured. Click on Sensor management:
Instrument setup
The device manager window will appear. To add a new instrument, click on the + button: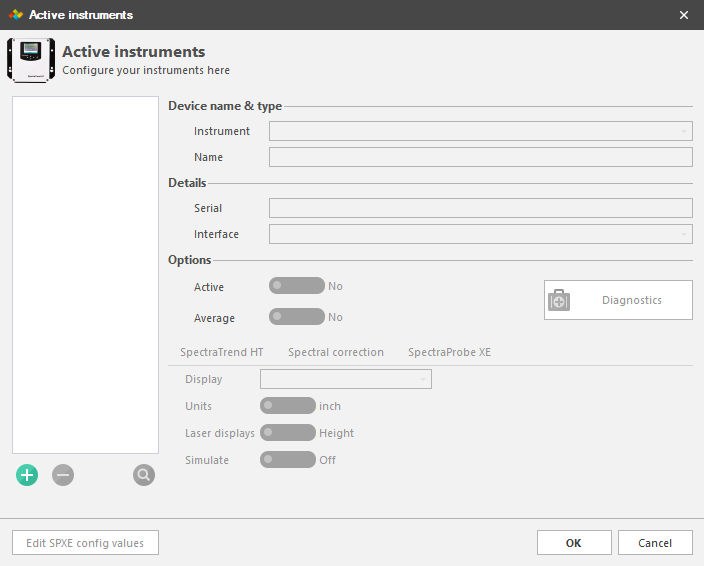
A new instrument is added with its default name. If you have more than one instrument at a line, choose an appropriate name like “left”, “right”, or “up” and “down”:

Then click on the search button:

If the instrument is not found, check network cabling and if the instrument is powered on. If it is not reachable, you can set the IP address of the instrument to a value that is reachable for the computer. To do so, use the Edit IP address button.
If the instrument was found and is reachable, the green checkmark indicates that communication is possible. Select the desired entry from the list and click Select:

After that, the configuration for the instrument(s) is complete. Click OK:

You are then back in the basic settings window. Click OK to close it. The software will start up and you are ready to use it.
You can then start configuring the views in the software, add standards and set up more options in the application settings. Please refer to the colorWorkbench manual for further details.
Add a license for colorWorkbench


The License management button is enabled now:

Open License management:

Click on the folder button and select the license file from the file selector. The license information will be updated. Restart the software.


0 Kommentare:
Kommentar veröffentlichen
Hinweis: Nur ein Mitglied dieses Blogs kann Kommentare posten.